There is a plenty of tutorials on gyroflow on youtube, but none are that detailed nor going in depth for the most important settings. Those two videos on youtube helped me understanding the settings:
Especially the second video about the Runcam Thumb helped a lot, not only on the camera side settings, but on the workflow with gyroflow. The first video was kind of asking for help, for not booting into windows, everytime i have to stabelize another Insta360 go (v1) video. The description of this video holds the settings, which where very helpful.
I try to combine both tutorials in this tutorial, so it's more useful informations on getting really good results in one place. In this tutorial, i'm using a video captured with my old kind of trusty mobius actioncam (Lens A) and the corresponding betaflight blackbox log (BBL) of my QAV180. Also a so called lens profile is needed, to remove the lens distortion, which i've created by my own (it can be found in the gyroflow lens profile library maybe in the next release). Gyroflow generally works with any actioncam or other video footage, as long as you're providing gyrodata and a lens profile.
After downloading the application for your operating system, the application welcomes you with this screen:
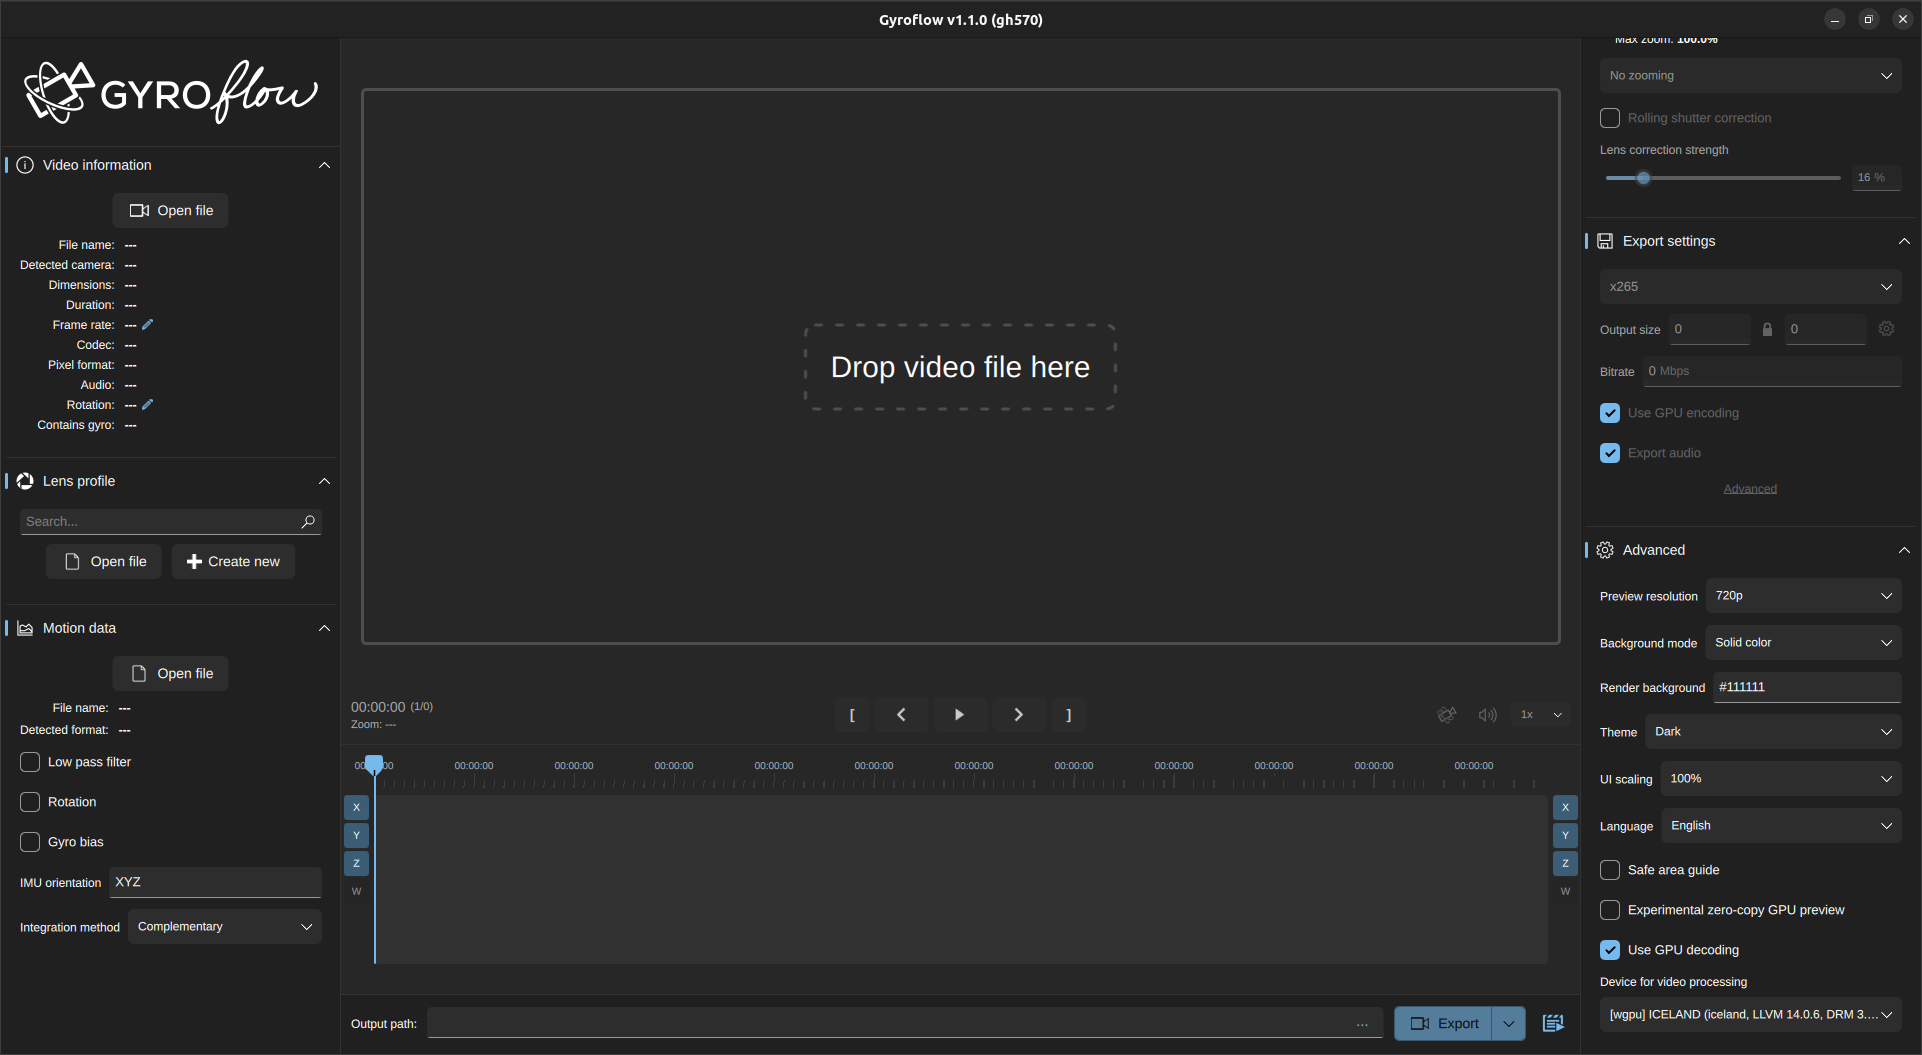
Let's take a look at the different fields:
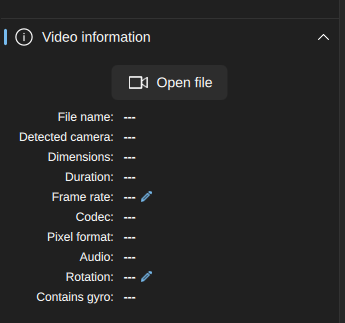
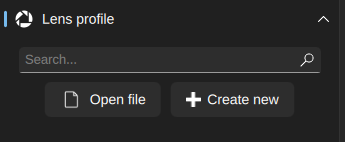
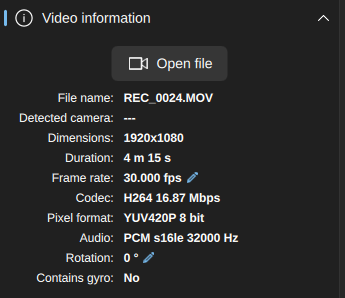
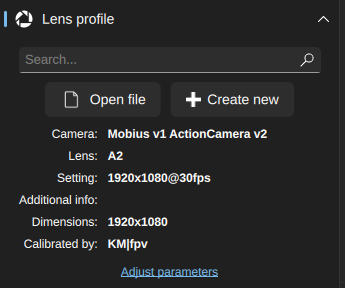
| video informations | lens profil | gyrodata |
|---|---|---|
 |
 |
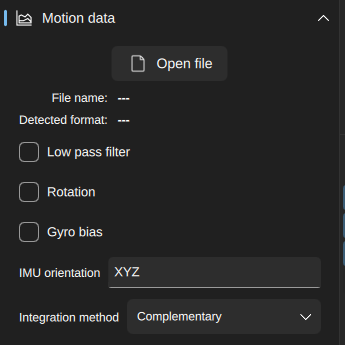 |
| all the details of the video are shown here: filename, detected camera, resolution, video- and audio - codecs, framerate, duration, gyrodata (y/n) | lens profile of the camera, to correct the lens distortion or create a new one | gyrodata from the loaded video or BBL. You can set a so called Low pass filter, a gyrodata-offset (gyro bias) and also the camera angle |
Dieser Bereich ändert sich natürlich, sobald ein Video und entsprechende Daten (Lens Profil und Gyrodaten) geladen wurden: Those fields change according to the loaded video file, gyrodata and lens profile:
| video informations | lens profile | gyrodata |
|---|---|---|
 |
 |
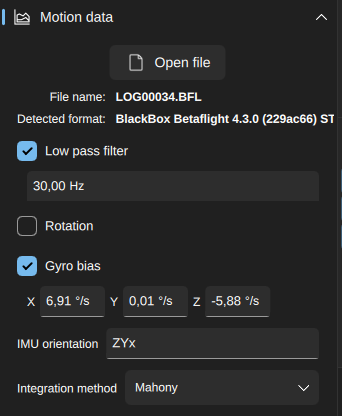 |
| now i've loaded my mobius ActionCam video. The camera model is not recognized, because this information i not stored in the video file. All other data fields are filled correctly from the file. | I've created and loaded my lens profile for my camera. You can also change some parameters here, but it's mostly not needed. | I've also loaded the BBL from the QAV180 and the source name is shown here. I had to add a 30Hz low pass filter, which can help filter bad props vibrations. You can change this to your needs, you will see the changes in the video. The gyro bias is also set, because it was slightly of. |
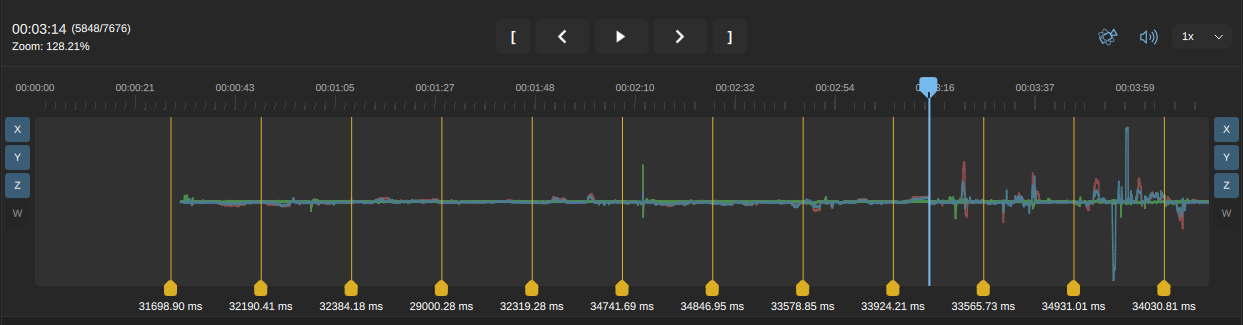
Because i'm using my mobius actioncam, which is startet "way before" arming the miniKwad itself, there is a big offset in gyrodata and actual flying (in this case, i had made some changes in betaflight OSD menu).
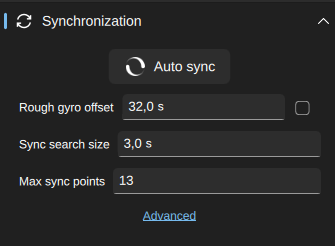
| Synchronization (simple) | Synchronization (advanced) |
|---|---|
 |
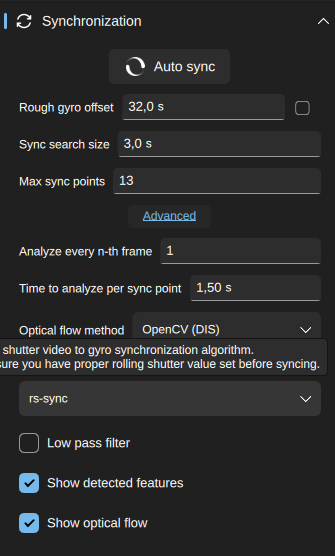 |
| Here you will always be shown the last used values for sync, which you can leave as it is in most cases of cameras with internal gyrodata (like GoPro, Insta360, Runcam Thumb), but not in my example here. | I've extended the settings here, so i can change some settings for the best results. |
Of course, i've reviewed the mobius video, and found the actual start of flying the miniKwad at about 32 seconds in the video, which you can adjust with rough gyro offset. I use max 13 sync-points (defaut is 3), which have 3 seconds of sync. per sync point to get the in video motion and gyrodata synchronized. The motion detection is done by OpenCV (DIS), which is a compromise of "fast and accurate" and re-sync helps to set the gyrodata start to the actual movement of the miniKwad.
| gyrodata adjustment | export settings |
|---|---|
 |
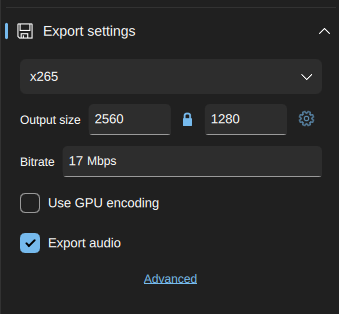 |
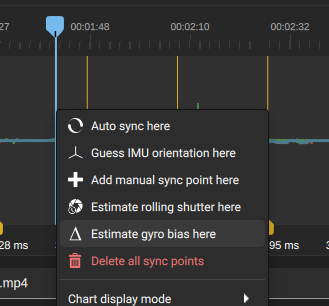
| To get the estimated gyro Bias, you have to right click the gyrodata-graph, which isn't always FTW. In case of the Insta360 go (v1) you really should do this! | Here you set your output resolution, which you should set before changing any stabilizing settings, because you will also work with this resolution. For other resolutions, which are non standard, you have to unlock the little locking symbol. |
Let's have a look at the video cutout without any changes:
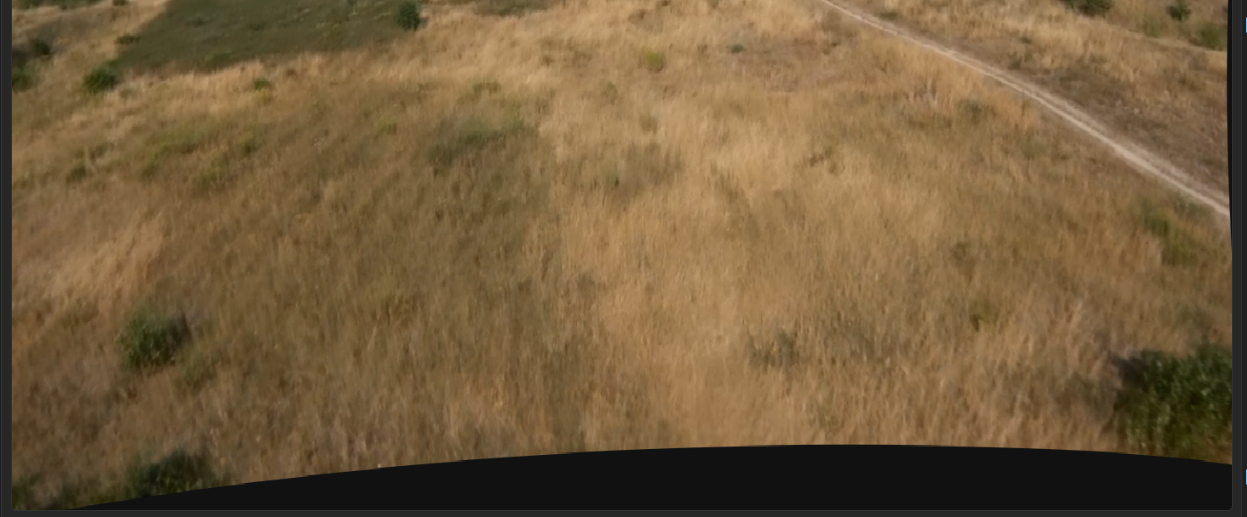 As you can see, there are some black areas on the right and bottom, in which you can see the lens distortion (extra hint 2) or, as you like to say so, how gyroflow moves the video content, to stabilize your video image using the gyrodata. To get rid of those black areas, we will change some settings.
 Now i've resized the FOV (Field Of View - what you will see in the end) from 1 down to 0,9, which is kind of zooming into the video. As a result of that, the black areas are smaller but not gone.
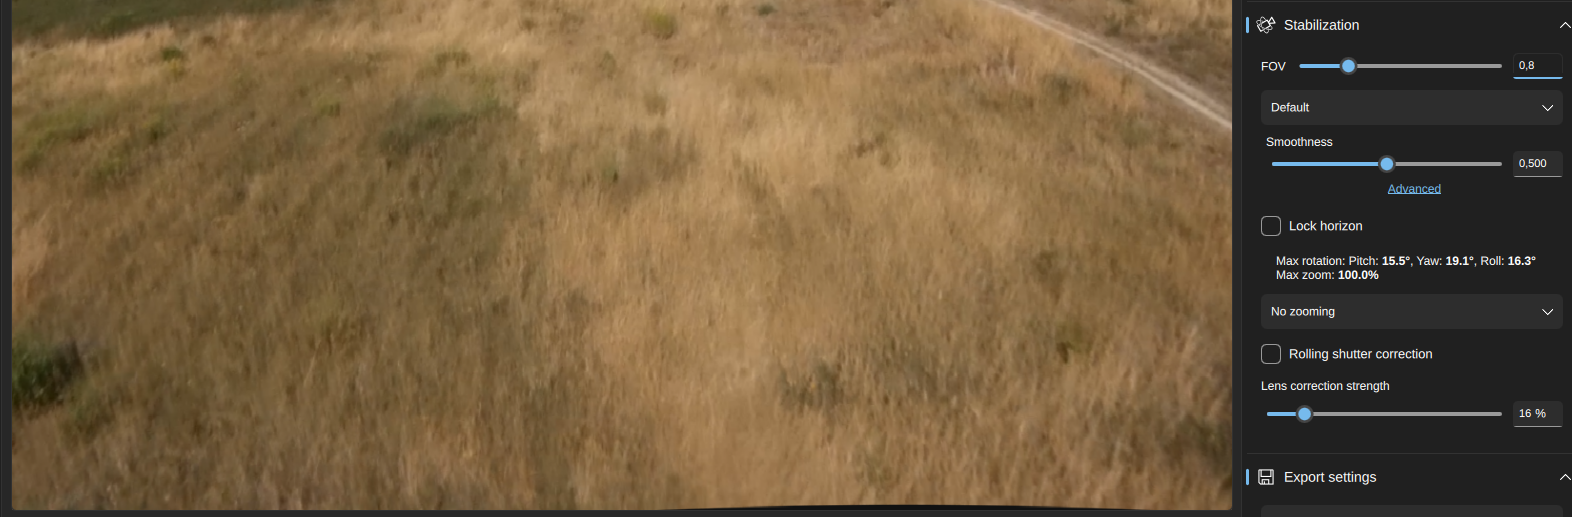 Second try to get rid of the black borders, is to decrease the FOV from 0,9 further down to 0,8.
The black area on the right hand was gone in the first try, but the bottom one is still visible.
Second try to get rid of the black borders, is to decrease the FOV from 0,9 further down to 0,8.
The black area on the right hand was gone in the first try, but the bottom one is still visible.
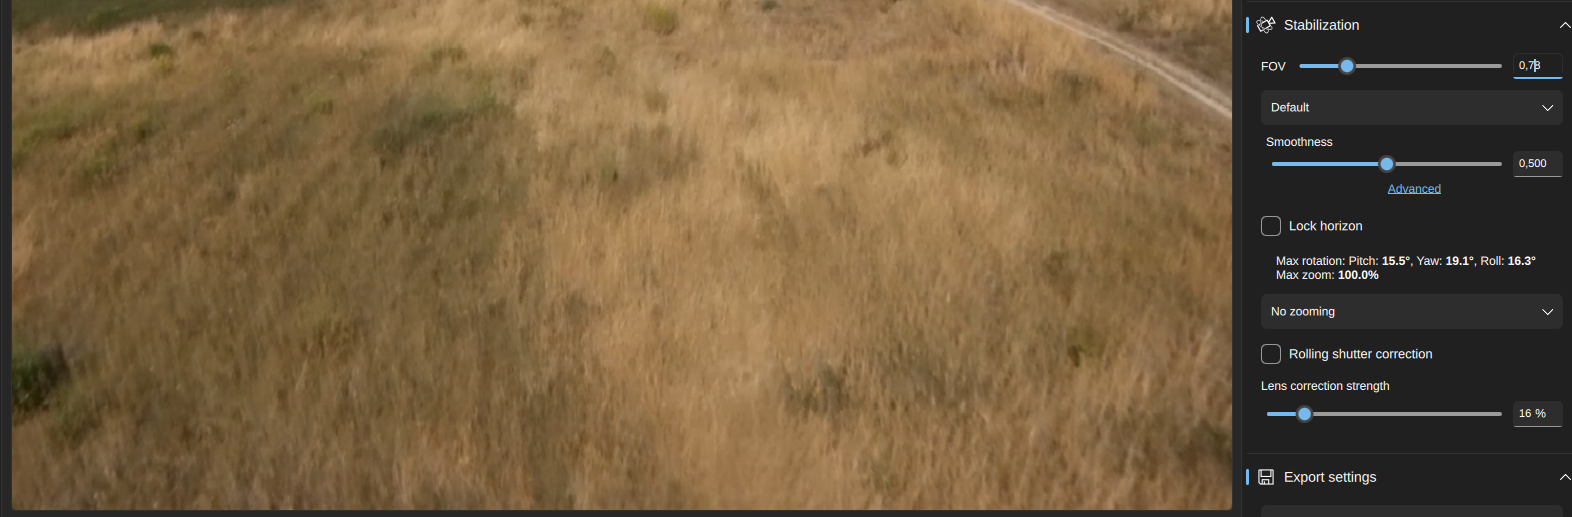 All the black areas are now gone, after decreasing the FOV to 0,78. But we have lost quite a bit of the video image, in fact we lost about 22%. To preserve as much as possible of the visible area, you should set your camera as high as possible.
Now it's getting very easy, for your style of flying:
| Freestyle | Cinematic |
|---|---|
| Smoothness needs to be set LOW, good values are 0,200 - 0,400 | Smoothness needs to be set HIGH, good values are 0,500 - 0,800 |
After all, i'll replay the video in gyroflow before exporting it. Maybe you have to change a bit in Smoothness or FOV. To finally export the video, you just click Export below the gyrodata graph, right behind the path, where the video will be expoerted to.

extra hints:
1) Lens Correction strength: I like to preserve distortion in my videos, so i use a correction of only up to 25% (in this example 16%). If you crank this value up, the horizon will be more straighten, but you will loose more content, more than in decreasing FOV. The Lens A of the mobius actioncam isn't distorted as much as others tend to have.
2)
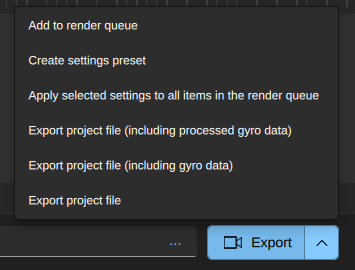
I recommend saving your work from time to time in a .gyroflow file. To do so, you've to select Export project file (including processed gyro data) in the dropdown behind the Export button. It needs some time and space on your hard drive, but you can start from your saving point and adjust settings, as needed.